HomeAboutContactSponsor
Showing posts with label Recipes. Show all posts

Wednesday, February 13, 2013

40 Days and One Recipe

Welp, today is the start of Lent for those of us who observe it. I must admit, I'm pretty darn excited. It's been a while since I've had the ashes placed on my forehead and it certainly symbolizes a lot to me this year. I love periods of time that challenge me to become better.

In previous years, I've always taken a different approach to Lent - a time of self-examination, self-denial, and amendment of life. Instead of giving up a food or sweet something, I always decided to pray more. I wanted that period of self-reflection. So, in addition to praying every night, for the next 40 days [and hopefully after that], I will be starting every morning off with a meditation, a prayer of thanks, a prayer for peace.

Prior to this Ash Wednesday, I also decided there were some things I wanted to give up. Things that, with time, had lost a lot of importance in my life. I knew that what little time I was being spent with those things could be spent somewhere much more worthy of my time. So, those things have been gone from my life and I haven't looked back since :)

Now, where were we? Ah, yes... speaking of becoming better. Since the move to San Diego, I've been challenging myself to try a bunch of new recipes. When I went home for Christmas, one of the appetizer dishes I decided to make was stuffed celery. 


Here's what you'll need:
[This makes 16 servings]

+ 1 (8 oz.) package of cream cheese, softened
+ 2 tablespoons sour cream
+ 1/4 cup chopped walnuts
+ 20 green olives with pimento, chopped
+ 1 bunch celery, cut into bite-size pieces

And here's all you have to do:

In a medium bowl, mix together the cream cheese and sour cream. Stir in the walnuts and chopped olives. Spread filling onto the celery pieces. It's also good on crackers.

--

I found the recipe over here while scouring the boards for tasty treats. My sister-in-law who doesn't love olives even liked the stuffed celery. Shoot, I'd even spread that stuff on sliced cucumbers. Yum! Super easy to make and just the perfect finger food! Last Christmas, I made spinach balls and they were a hit as well!

In the spirit of Fat Tuesday and Mardi Gras earlier this week, I made Shrimp Jambalaya and, I must say, aside from my chocolate chip cookies, it is THE greatest dish I've made! Hungry now? Go make some stuffed celery ;)

I can't wait to see what positive changes will take place in these next 40 days and all the fantastic new recipes I've yet to try :)

Friday, May 25, 2012

Memorial Day Treats Last Year

It's almost Memorial Day weekend, friends! Time for boats, BBQ's, and bikinis... but, most importantly, it's time to remember the fallen soldiers of the U.S. Armed Forces. I'm grateful for the ancestors, friends, neighbors, and strangers who have fought for our country.

Last year, in honor of the great Red, White, and Blue I made some tasty treats that I found over on Cupcakes and Cashmere.


What you'll need:
1. Pretzel rods
2. White chocolate chips
3. Red, white, and blue sprinkles
4. Patience

I threw in the patience because it's definitely easier said than done, for me at least! As I'm sure you can tell, the chocolate didn't magically disperse itself perfectly onto the pretzels, nor did the sprinkles, and gravity sure didn't help either. Oh well. They tasted yummy and that's really all that matters in the end, yes?

But, seriously... carefully melt the chocolate chips (on lower power in the microwave stirring small amounts together at a time), then smooth the melted chocolate onto the top of the pretzel rod (I used a spatula) and sprinkle on some sprinkles!

Then, enjoy!

Last year I was in Utah, missing some of the East Coast Memorial Day traditions (Rolling Thunder, anyone?) and this year I'll be spending half of my time out of town to visit friends and the other part of it in the DC area :) May your long/holiday weekends all be wonderful!

What are your Memorial Day plans this year? :)


Tuesday, November 1, 2011

Halloweekend Part Two

Happy November! What the heck, right? If you’re reading this, it means I did escape/survive Michael Myers! Whew! By the way, I was SO glad to find out I’m not the only one who’s terrified of him.

This past Saturday was the “Air and Scare” event held at the newish Air and Space Museum in Northern Virginia. It was an opportunity for the little ones to do some indoor trick or treating while also exploring some of the world’s most famous and fascinating aviation exhibits. We’re talking spaceships, missiles, fighter jets, commercial airplanes, etc. They had tons of fun activities, science experiments, and photo ops for the older kids too.

The place. was. packed.
Kids, strollers, moms dressed up like they are still twenty-one {but hey, I’m not judging}, and many people speaking languages other than English. It was quite an experience really :)
Most importantly, my little niece Aubrey had a BLAST! She’s just over a year old and could only comprehend so much but, boy did she LOVE “walking” around and pointing at everything!

Let me start off by saying that it was snowing, windy, and COLD. While I’m used to it after living in Salt Lake City for a while, it just didn’t work for my hair. Sooo just ignore my hair in any pictures :)
DSC_2838

Isn’t she a cute, little witch?

DSC_2832

DSC_2845

Who you gonna call?

DSC_2848

DSC_2850 
F-14 Tomcat! Saw these a lot in Virginia Beach growing up :)
DSC_2851 
Shoutout to Oceana!

DSC_2835 
The SR-71 Blackbird – the world’s fastest jet. It almost reminds me of some sort of alien aircraft…


Helping my niecey trot around with her pink pumpkin! She only needs one hand to help her now!

DSC_2853
It was pretty dang cool to stand next to the space shuttle!

 DSC_2859-1
The Apollo 11 Command Module that landed in the ocean carrying all the astronauts after landing on the Moon :)

DSC_2857-1

DSC_2862
Oh, and Chewbacca made an appearance!

DSC_2868-1 
A whole lotta Nazi Germany aircraft

DSC_2873
The nose of the Enola Gay – the bomber that dropped the Atomic Bomb on Hiroshima…

DSC_2866

PA290234
Me and Aubrey having a blast with all the fun things to look at! :)

DSC_2874
The Concord! It was pretty tough to get a good picture of it because of its size. The windows were SO small!

DSC_2875-1 
Can you believe this little “Airphibia” doubled as a plane and a car? The front part could detach and drive on the road!

We were all wiped out after hours of walking around and headed out for some delicious dinner at a place called Willard’s. Of course, I was too hungry to think about taking pictures of dinner at that point :(

HOWEVER, I did take pictures of some tasty HALLOWEEN treats I baked up!

Pumpkin Cheesecake Bars

DSC_2759
Prior to cutting! These were so yum. Perfect with a cup of hot chocolate or coffee! Even my brother enjoyed them {and he doesn’t even like anything cheese-related!}
You can find the recipe
here. I followed it exactly and they turned out fabulous :)

This weekend I also made some DIRT and WORMS!

I couldn’t help it, really. I remember being a child and being allowed to order this as a dessert off the kids’ menu every so often and I would always gobble it right up {mainly because it’s so chocolatey and I can’t say “no” to chocolate} It was perfect for Halloween!

DSC_2881

This one is so easy you don’t really even need a recipe!

Just buy a box of instant chocolate pudding, prepare. Crush Oreos depending on how much dirt you want {I put a bunch of Oreos in a Ziploc bag and crushed them with a meat mallet.} Then, place the pudding in a serving dish, cover with the “dirt,” and garnish with worms!
Cheers!

DSC_2882 

So, that was my Halloween, friends! Watched some more of the Halloween movies, a little of the Ghost Hunters Live special, saw some cute trick-or-treaters, and ate dirt and worms! If you made it through this whole picture-heavy post, thank you!

How did you spend your Halloween? If you fought the urge to eat any leftover candy, I commend you. Wish I could say the same!

Thursday, July 7, 2011

Recipes Lately

Back when I lived in Virginia with my parents after college, I went on a huge baking streak. Up to that point, I had always baked the cake, brownies, and cupcakes from the box. One day on my lunch break at work I found some food website (don’t remember the name) that was actually quite similar to Pinterest except it was all for food. I could search for mint cupcakes and pictures linking to recipes for mint cupcakes would show up. (Or any type of food!) Gotta love it. So, I picked out recipes I wanted to try and with the help of my mom’s amazing Kitchen Aid, started baking up a storm.

Once I moved to Utah and had my very own gas stove, I continued to bake from scratch. I made some authentic Polish pastries, my “secret ingredient” chocolate chip cookies, and attempted my Candy Cane Cake. I was disappointed that, because of the elevation in Utah, my recipes didn’t always come out as perfectly as back in Virginia. Ah, well!

So, lately I wanted to find some recipes that wouldn’t break the bank. (Let’s be honest – some ingredients can be more expensive than others.) Today I’ll be sharing my latest recipes and what I thought of the final product. My 4th of July cupcakes from this post will be featured last :)

Vegetarian Enchiladas

This recipe is also referred to as “Cheater’s Enchiladas” because it’s in more of a casserole/lasagna format. What the recipe calls for:

  • 1 (16 ounce) container sour cream
  • 12 ounces shredded Monterey Jack cheese
  • 1 (20 ounce) can green enchilada sauce
  • 18 (6 inch) corn tortillas
  • 1 (2 ounce) can chopped black olives

Since this recipe calls for A LOT of sour cream, cheese, and tortillas, I decided to not use them all.

I used light sour cream and the container I got was a little bit less than 16 oz. I used probably about 1/4 of the cheese the recipe calls for. I also used 9 tortillas instead of 18. 18 just was not necessary if you ask me.

  1. Preheat oven to 350 degrees F (175 degrees C).
  2. In a small bowl, combine the sour cream and 3/4 of the cheese.
  3. Into a 9x13 inch pan, pour a small amount of enchilada sauce to coat bottom of pan. Layer 6 tortillas on bottom of pan. Layer half of the cheese-sour cream mixture and 1/3 of the olives over the tortillas. Repeat this layer once more. Pour the remaining enchilada sauce over the final layer of tortillas.
  4. Bake for 20 minutes. Cut into squares and serve.

DSC_1580

The second time I made this recipe, I put some of the olives on top as well and less cheese on top and it was just as yummy! Also, I thought this recipe was even better the next day as leftovers because the sauce is a little less runny after being in the fridge! Again, this isn’t the healthiest of meals, but it’s easy to make, delicious, and gives you plenty of leftovers!

So, I don’t think I ever told you all about my disaster green smoothie recipe. Some other day. Let’s just say I had some leftover mustard greens and had NO idea what to do with them so I looked up recipes using these leafy, super healthy greens.

Penne with Green Olives and Feta

  • 1/4 cup chopped fresh Italian parsley
  • 1 teaspoon finely grated lemon peel
  • 1 garlic clove, minced
  • 1 large bunch greens (such as spinach, mustard greens, kale, or broccoli rabe; about 1 pound), thick stems removed, spinach left whole, other greens cut into 1-inch strips (about 10 cups packed)
  • 12 ounces penne
  • 5 tablespoons extra-virgin olive oil, divided
  • 1/2 cup coarsely chopped pitted Kalamata green olives
  • 1/2 cup crumbled feta cheese (about 3 ounces)

    I didn’t have lemons so I scratched that ingredient and since Kalamata olives are a bitttt too pricey for my liking, I went with pitted green olives and chopped them up.

    Mix parsley, lemon peel and garlic in small bowl; set aside.

    Bring large pot of salted water to boil. Add greens and cook just until tender, 1 to 6 minutes, depending on type of greens. Using skimmer or slotted spoon, transfer greens to colander to drain. Return water to boil. Add pasta and cook just until tender but still firm to bite, stirring occasionally. Drain, reserving 3/4 cup pasta cooking liquid. Return pasta to pot; add greens and 3 tablespoons oil and toss. Stir in olives, feta, and enough reserved pasta cooking liquid by 1/4 cupfuls to moisten. Season with salt and pepper. Transfer to bowl. Drizzle with remaining 2 tablespoons oil. Sprinkle with parsley mixture and serve.

    Pasta

    The recipe tasted super healthy and wasn’t very heavy. If you like pasta dishes, this is definitely one to try and might even be tasty served cold for leftovers? I’m not the biggest pasta fan but still enjoyed this dish!

    Now you’re probably wondering about those 4th of July Cupcakes. If you lived close by, I’d say we should meet up and I’ll bring you some because there are a TON still here!

    4th of July Cupcakes

    If you have a white cake recipe, go ahead and use that. Here’s the recipe I used via AllRecipes

    • 1 cup white sugar
    • 1/2 cup butter
    • 2 eggs
    • 2 teaspoons vanilla extract
    • 1 1/2 cups all-purpose flour
    • 1 3/4 teaspoons baking powder
    • 1/2 cup milk
    1. Preheat oven to 350 degrees F (175 degrees C). Grease and flour a 9x9 inch pan or line a muffin pan with paper liners.
    2. In a medium bowl, cream together the sugar and butter. Beat in the eggs, one at a time, then stir in the vanilla. Combine flour and baking powder, add to the creamed mixture and mix well. Finally stir in the milk until batter is smooth. (This is the point where you’ll want to divide the batter into three. I used Wilson Icing Colors to dye the batter red and blue respectively and left one bowl as is.) Pour or spoon batter (a little blue, a little red, a little white) into the prepared pan.
    3. Bake for 30 to 40 minutes in the preheated oven. For cupcakes, bake 20 to 25 minutes. Cake is done when it springs back to the touch.

    Here’s the buttercream frosting recipe I used:

    • 2 cups (230 grams) confectioners sugar (icing or powdered sugar), sifted
    • 1/2 cup (113 grams) unsalted butter, room temperature (I used salted because it’s what I had)
    • 1 teaspoon pure vanilla extract
    • 2 tablespoons milk or light cream

    In an electric mixer, or with a hand mixer, cream the butter until smooth and well blended. Add the vanilla extract. With the mixer on low speed, gradually beat in the sugar. Add the milk and beat on high speed until frosting is light and fluffy (about 3-4 minutes). Add a little more milk or sugar, if needed.

    I doubled the batter and frosting recipes because the more cupcakes, the merrier. Right?

    Now, maybe it’s just me or perhaps the food coloring, but the first batch I put in the oven overflowed. I only filled the cupcake liners up 2/3 of the way, too!

    Big Cupcakes

    Yeah, I don’t know. Luckily, the big cupcakes have been my favorite. Probably because they have an eensy bit more deliciousness to them, duh. But then I challenged myself to make perfect cupcakes and filled the cupcake liners umm halfway and they came out just right. Go figure.

    Yum

    Red White Blue

    I think this is one of the first times that my frosting has turned out looking decent after using a spatula. The trick? Take a generous amount of frosting, place it in the middle of the cupcake and smooth the frosting out toward the sides while rotating the cupcake. Sounds more complicated than it is. I promise. So, there you have it. My latest baking/cooking recipes!

    If you try any of these, you’ll have to let me know what you think :) I love easy, budget-friendly recipes so if you have any, send them my way!

  • Tuesday, June 21, 2011

    Gimme the Grapefruit

    Grapefruit

    So, in case you don’t know, I’ve been doing my best lately to eat as fresh and healthy as possible. I’m a pescatarian (meaning I eat fish but no chicken, beef, etc.) and have been incorporating lots of fresh fruits and veggies into my meals. This is not a diet, simply a healthier lifestyle.

    Yesterday I sliced into a nice, juicy grapefruit. I sat there and looked at each half and was at peace, almost. Yes, I guess grapefruit brings me peace in this world. No, but seriously I was happy and thought back to years of Summer memories. My mom almost always had grapefruit in the house during the Summer months. I’d have half a grapefruit with my breakfast or half with my dinner. It was delicious and I loved it. When I was younger, I would eat all the little pieces and then when I was done, I’d squeeze the juice out and fill up the grapefruit with water. That memory came back to me today while I was separating the individual grapefruit sections. I was trying to think what the heck I was thinking/pretending when I would fill the grapefruit back up with water. Seriously. I had quite the imagination so the possibilities are endless.

    Back to present day. Once I had the grapefruit all separated (I’m not even sure what you call the process of cutting the skin away from the actual grapefruit) I sprinkled a little sugar on top and enjoyed the delicious fruit. I have never had a bad grapefruit in my life. Do I need to knock on wood for that one? It’s always been juicy and sour with a touch of sweetness. Perfection.

    Back when I worked at my {awesome} job in DC, my department would get the occasional hook up with coffee. Since I didn’t drink coffee, I would get offered a big glass of ice cold grapefruit juice. Mmmm. It’s always so refreshing and HEALTHY! Think about it… apple juice, orange juice, lemonade – all pretty much sweetened to taste. I could squeeze the juice of a grapefruit and drink it like that. No added sugar. Yum.

    Okay, before you start to think I’m some crazy grapefruit-obsessed girl (this was the first time I’ve had a grapefruit in over a year if that helps) I wanted to share with you some tasty, or so I assume, recipes with grapefruit! Ready, go!

    GrapefruitMeltaways

    I’ve never quite been the “fruity dessert” kind of girl. (What can I say? I love my chocolate.) However, I’d be willing to give these Grapefruit Meltaways a shot! Okay, I admit… my mouth is watering just looking at this picture!

    GrapefruitSoda

    I love a little bubbly in my drinks so, if you’re anything like me, you might like this recipe and the next one. This Grapefruit Soda looks super easy to make and perfect for a hot, Summer’s day!

    GrapefruitMimosa

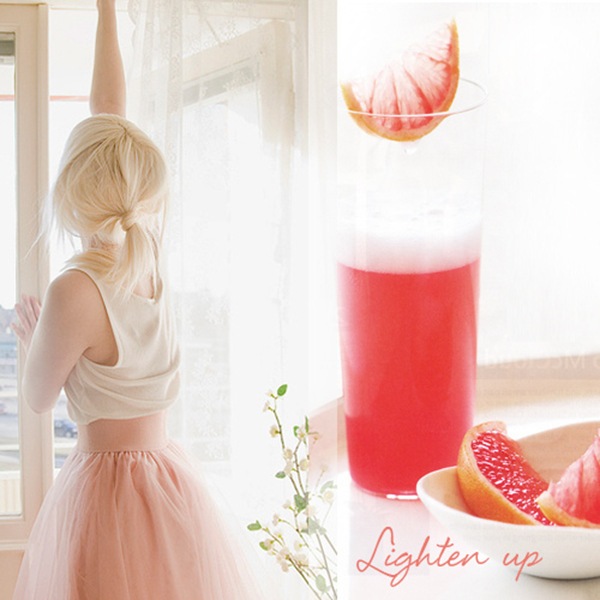
    I bet this Grapefruit Mimosa would be a great touch to a Summer brunch or something for the ladies to sip on during a backyard BBQ! How cute is the grapefruit slice as a garnish?

    GrapefruitCake

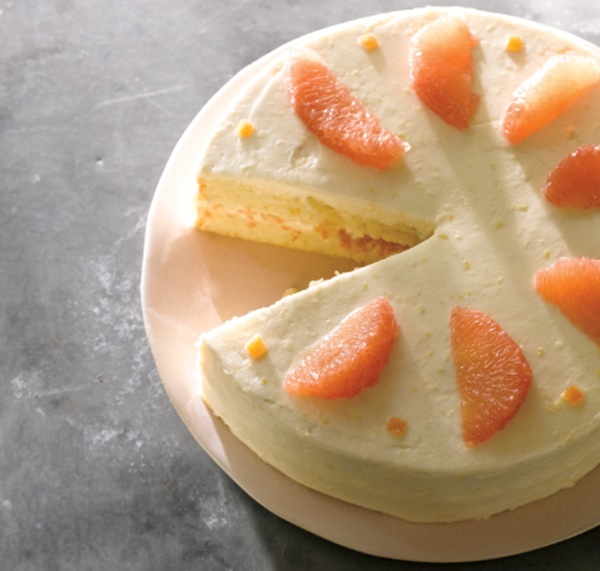
    Speaking of BBQ’s, if you’re signed up to bring something sweet, this Brown Derby Grapefruit Cake just might be a hit! Apparently this recipe has quite the history in classic Los Angeles. That’s got to be worth something, right?

    This last recipe is one I think I’ll definitely have to whip up soon!

    GrapefruitAlaska

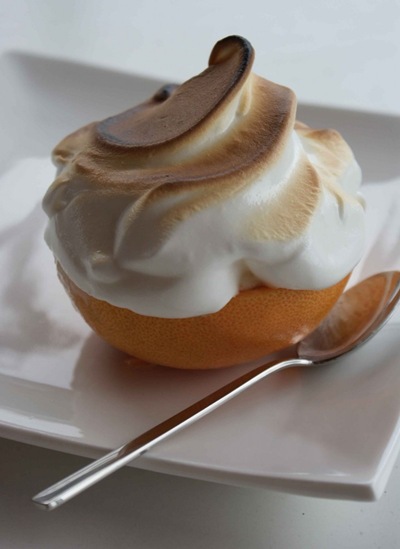
    Ice cream and merengue on top of grapefruit? Seriously? They call it Grapefruit Alaska and there’s something about the uniqueness and intrigue of this recipe that makes me put this on my “to-make” list.

    Even after looking at all these grapefruit drinks and desserts, I’d still be perfectly content with my simple yet delicious grapefruit half. Just sayin’ :)